NestJS 入門
はじめに
NestJS への入門としてNestJS のインストールから簡単な API の追加までをまとめます。
NestJS は Typescript で書かれた ServerSide Web Frameworkです。
nestjs/ng-universal というAngular 用の Server Side Rendering ライブラリーや、公式でOpenAPI対応 があり Angular との相性が良さそうです。
NestJS のインストール
NestJS は Angular 同様 CLI ベースでアプリケーションの管理を行います。まずは CLI をインストールします。
$ npm i -g @nestjs/cli
$ nest --version
6.12.9
$ nest --help
Usage: nest <command> [options]

Options:
  -V, --version                                   output the version number
  -h, --help                                      output usage information

Commands:
  new|n [options] [name]                          Generate Nest application
  build [options] [app]                           Build Nest application
  start [options] [app]                           Start Nest application
  generate|g [options] <schematic> [name] [path]  Generate a Nest element
    Available schematics:
      ┌───────────────┬─────────────┐
      │ name          │ alias       │
      │ application   │ application │
      │ angular-app   │ ng-app      │
      │ class         │ cl          │
      │ configuration │ config      │
      │ controller    │ co          │
      │ decorator     │ d           │
      │ filter        │ f           │
      │ gateway       │ ga          │
      │ guard         │ gu          │
      │ interceptor   │ in          │
      │ interface     │ interface   │
      │ middleware    │ mi          │
      │ module        │ mo          │
      │ pipe          │ pi          │
      │ provider      │ pr          │
      │ resolver      │ r           │
      │ service       │ s           │
      │ library       │ lib         │
      │ sub-app       │ app         │
      └───────────────┴─────────────┘
  info|i                                          Display Nest CLI details
  update|u [options]                              Update Nest dependencies
  add <library> [args...]                         Add a library
NestJS Project の作成
まずは project を作ります。
途中 npm、yarn どちらを利用するか聞かれます。
Angular CLI のような構成が吐き出されています。
$ nest new nest-example
? Which package manager would you ❤️  to use? npm
$ cd nest-example && tree . -L 2
.
├── README.md
├── nest-cli.json
├── node_modules
├── package-lock.json
├── package.json
├── src
│   ├── app.controller.spec.ts
│   ├── app.controller.ts
│   ├── app.module.ts
│   ├── app.service.ts
│   └── main.ts
├── test
│   ├── app.e2e-spec.ts
│   └── jest-e2e.json
├── tsconfig.build.json
├── tsconfig.json
└── tslint.json
とりあえずこのまま起動してみます。
http://localhost:3000 を開くと Hello World!が表示されます。
$ npm run start
$ open http://localhost:3000
NestJS へ API の追加
例として User API を作ってみましょう。
/users で全てのユーザーを返却し /users/:id で特定IDのユーザーを返却します。
src 配下に配置されている通りmodule service controllerを作っていきます。
module の追加
まずは module を追加してみます。
module は同名のフォルダが掘られます。
$ nest generate module User
CREATE /src/user/user.module.ts (81 bytes)
UPDATE /src/app.module.ts (308 bytes)
service の追加
User の型定義を行いたいので interface を切ります。
$ nest g interface User/User
CREATE /src/user/user.interface.ts (25 bytes)
今回は ID と名前だけです。
export interface User {
    id: string;
    name: string;
}
service を追加します。
$ nest g service User
CREATE /src/user/user.service.spec.ts (446 bytes)
CREATE /src/user/user.service.ts (88 bytes)
UPDATE /src/user/user.module.ts (155 bytes)
全てのユーザーを返す listUsers と指定された ID に対応するユーザーを返すgetUserを作りました。
import { Injectable } from '@nestjs/common';
import { User } from './user.interface';

@Injectable()
export class UserService {
  private readonly users: User[] = [{id: 'a', name: 'Aliec'}, {id: 'b', name: 'Bob'}, {id: 'c', name: 'Catherine'}];

  listUsers(): User[] {
    return this.users;
  }

  getUser(id: string): User {
    return this.users.find(value => value.id === id);
  }
}
controller の追加
controller を追加します。
$ nest g controller User
CREATE /src/user/user.controller.spec.ts (479 bytes)
CREATE /src/user/user.controller.ts (97 bytes)
UPDATE /src/user/user.module.ts (241 bytes)
@Controller('user') 配下に先ほど作ったサービスを並べていきます。
localhost:3000/user に対する GETメソッドではlistUsersが呼ばれ、localhost:3000/user/<ID> へのアクセスではgetUserが呼ばれます。
import { Controller, Get, Param } from '@nestjs/common';
import { UserService } from './user.service';
import { User } from './user.interface';

@Controller('user')
export class UserController {
  constructor(private readonly userService: UserService) {}

  @Get()
  listUsers(): User[] {
    return this.userService.listUsers();
  }

  @Get(':id')
  getUser(@Param('id') id: string): User {
    return this.userService.getUser(id);
  }
}
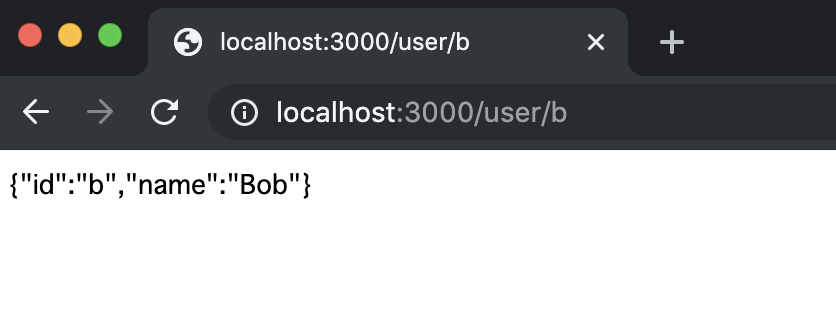
試しにlocalhost:3000/user/bへアクセスしてみます。

まとめ
NestJS のインストールから簡単な API の追加までをまとめました。
Python Flask のような手軽さと型が使える安心感がありますね。
次回は Angular と合わせて利用してみます。
